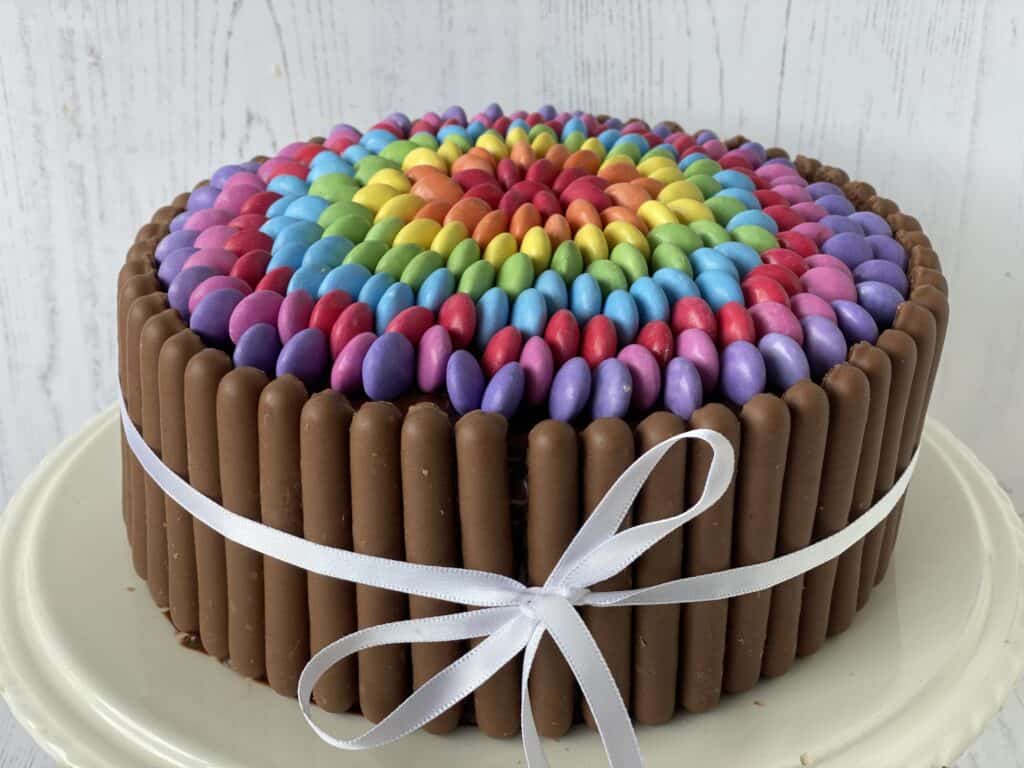
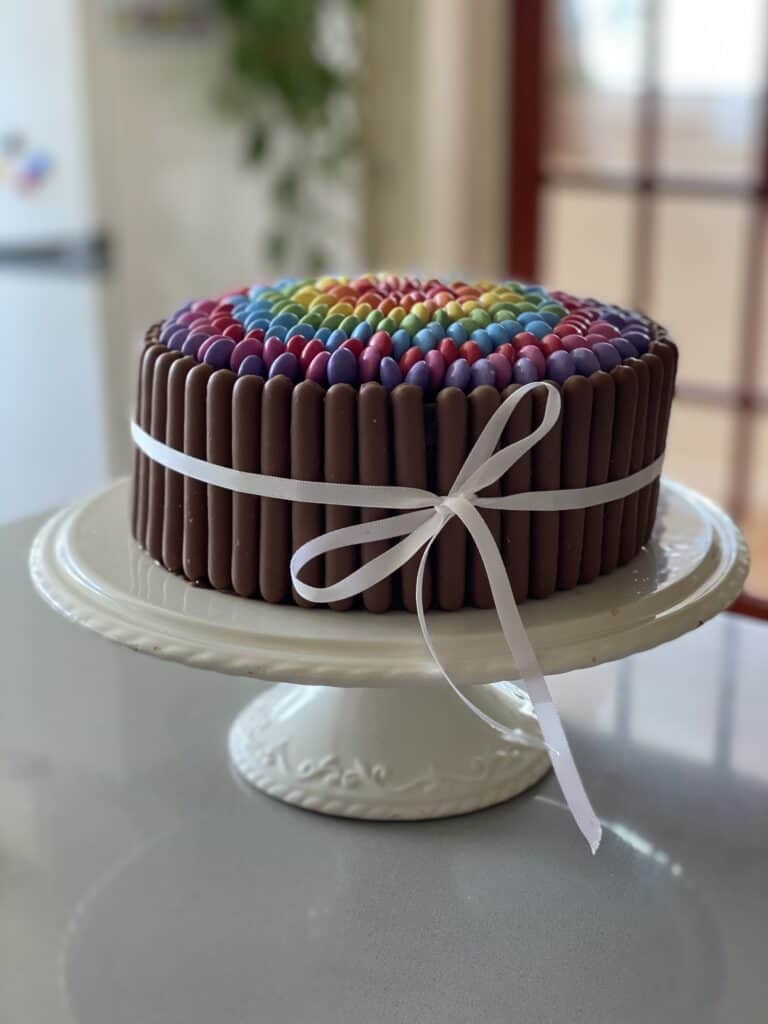
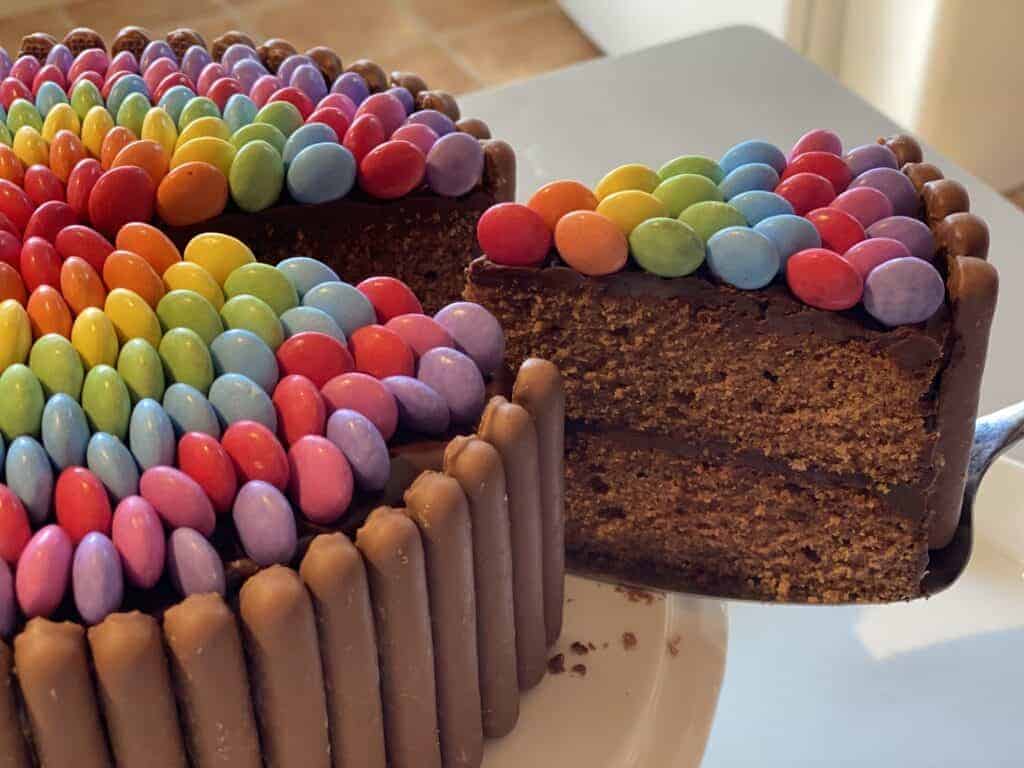
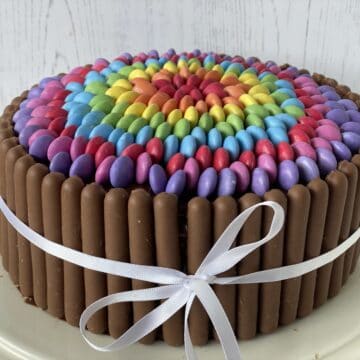
This easy to make, Chocolate Smarties Cake, makes the ideal celebration cake. With two layers of chocolate sponge, filled and topped with a chocolate glaze, that is easy to slice when set and surrounded by chocolate fingers and rainbow coloured smarties.
I made this cake for my son's recent birthday, I wanted something that was not only easy to make but it had to taste great too. By the end of the day, most of the cake was eaten. I offloaded half to some of my family who lives nearby.
This chocolate birthday cake is an adapted version of my Easy Victoria Sponge Cake Recipe but with cocoa powder added and then filled and topped with an Easy Chocolate Glaze surrounded by chocolate fingers and dozens of chocolate smarites.
Important notes before you begin.
Before you start to make this Chocolate Smarties Cake, there are a few things that you need to watch out for.
Ensure that you have enough packets of smarties. I suggest you separate them all into different colours to ensure you have enough. Do not be tempted to eat any smarties until you are done. You will not be happy if you can't fill a missing gap simply because you couldn't resist the urge to eat a few while you were baking.
The chocolate mixture will set firmly but still soft enough to slice, but you'll need to act quickly to get all the smarties and the chocolate finger decorated around the cake.
How to Make a Chocolate Smarties Cake
Preheat the oven to 180 fan (assisted oven). Grease and line the base and sides of 2 x 19cm loose bottomed cake tins with baking parchment
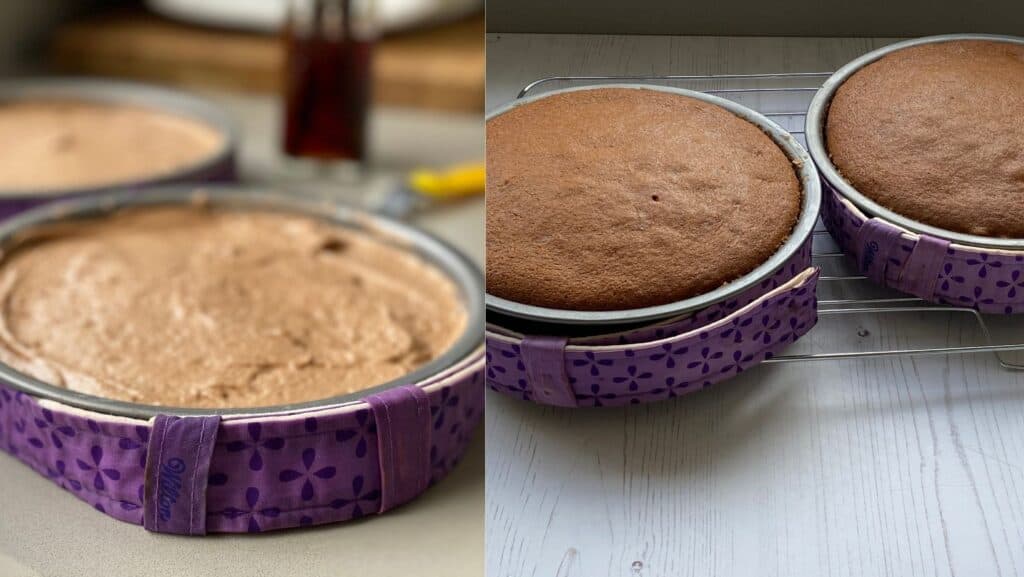
If using them, start soaking your baking bands in cold water or use them according to the manufacturer's instructions.
I've started to use baking bands a lot more because they give a much flatter surface to my cakes and helps keep the sides nice and moist preventing them from over baking.
Beat together the butter and sugar until light and fluffy. Add the vanilla extract and the eggs, one at a time adding a little flour between each one to help prevent curdling.
Add the sieved cocoa powder and the remaining flour. Mix until well combined. Pour the cake batter evenly between each cake tin. Remember to wrap the soaked baking bands around the outside.
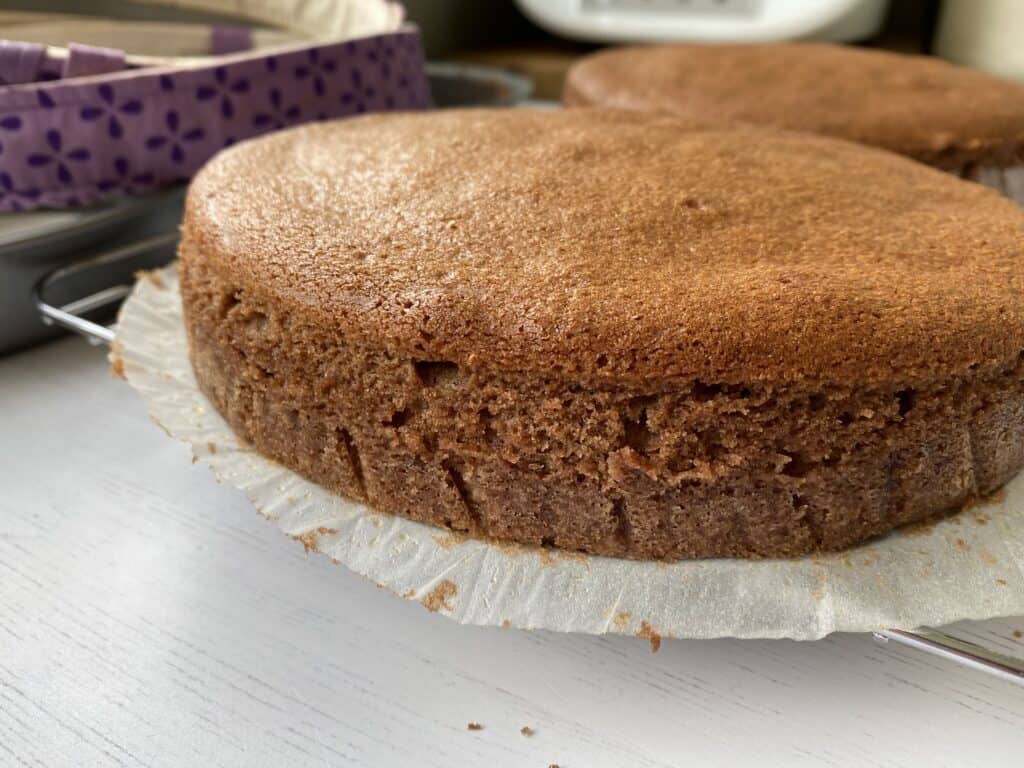
Bake in the centre of the oven for 20 - 25 minutes, or until baked, testing the centre of each cakes with a skewer until it comes out clean.
Leave in the tins to cool a little before turning out onto a cake rack to cool completely before filling and topping with the chocolate mixture.
Make the Chocolate Filling
Melt the butter and chocolate in a heatproof bowl over a pan of simmering water, until the mixture is nice and smooth with no lumps. Leave to cool a little, but not for too long or the mixture will begin to set.
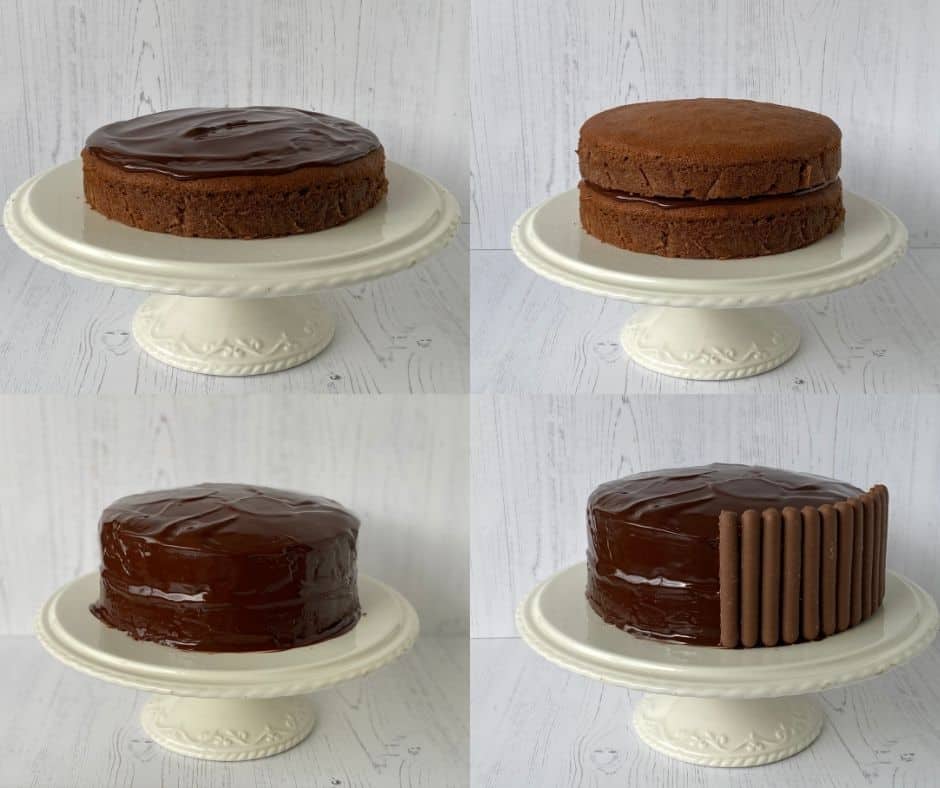
Place one of the cakes onto your favourite cake stand or plate. Carefully spread about ⅓ of the chocolate mix evenly over the top. Add the second sponge cake. Spread more mixture over the top and sides of the cake.
Start to add the finger biscuits around the edges of the cake. You will need to do this before the chocolate coating begins to set.
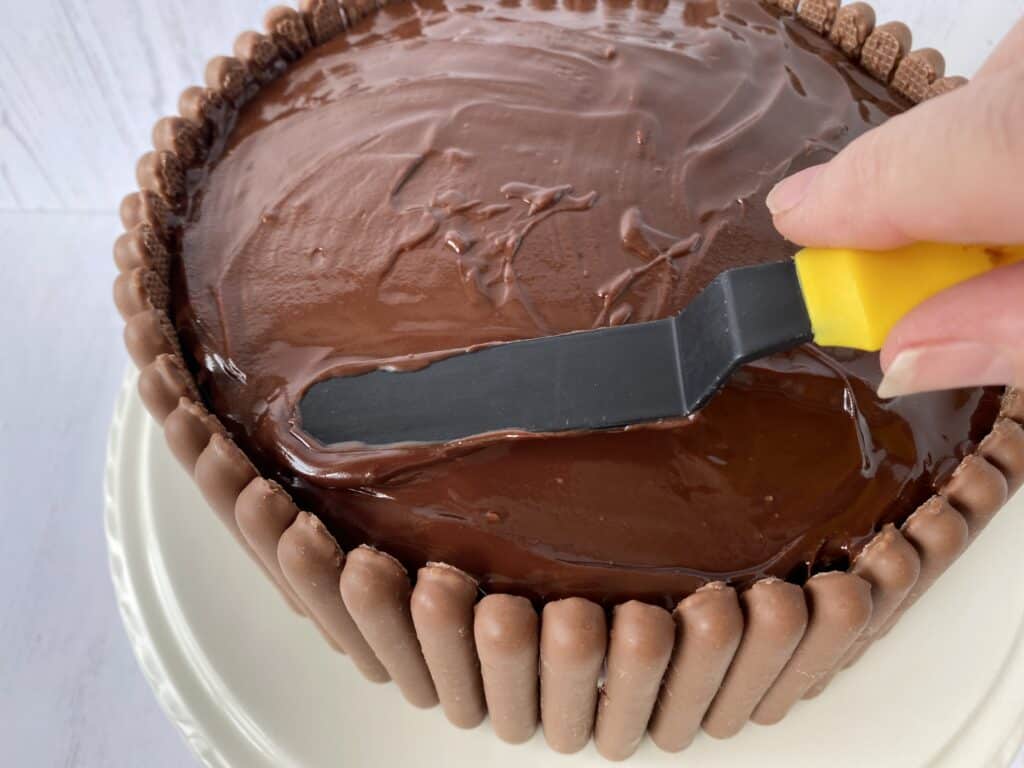
Spread any remaining chocolate evenly over the top of the already setting chocolate layer.
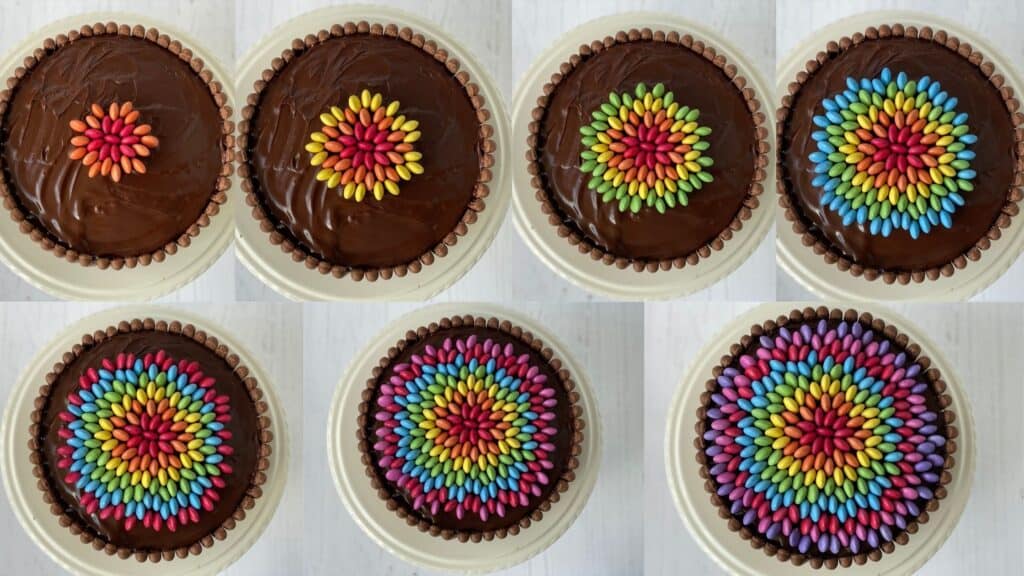
Before the chocolate sets completely, start to decorate with the coloured smarties.
Notes: Separate all the colours into individual bowls so that you can see how many you have. Press each smartie down a little to imbed itself firmly into the chocolate.
Wrap a ribbon around the outside of your Smarties Cake to help support the chocolate fingers and keep them in place.
If you make this cake for a celebration or for someone special, I hope you all have a wonderful time. I'd love to know how you decorate your Smarties Cake
Tips and FAQ's
- Ensure your hands are dry when decorating with smarties, as the colour could fade and discolour your hands if they are wet.
- To avoid the chocolate fingers from falling off the cake, tie a pretty ribbon around them to keep the biscuits upright.
This cake will last for up to 3 days at room temperature.
Cover your cake with melted chocolate and decorate with Smarties before the chocolate sets.
Chocolate Smarties Cake
Equipment
- 2 x 19cm loose bottomed Sandwich tins
- Baking Parchment
INGREDIENTS
- 225 g Butter at room temperature
- 225 g soft brown sugar
- 1 teaspoons vanilla extract
- 4 medium eggs medium sized
- 225 g self raising flour
- 2 tablespoon cocoa powder sieved
- Filling and Topping
- 250 g dark chocolate roughly chopped
- 120 g butter
- 10 tubes 38g each tube of smarties total approx. 380grams
- 3 boxes of chocolate fingers biscuits
Instructions
- Preheat the oven to 180 fan (assisted oven). Grease and line the base of 2 x 19cm Loose bottomed cake tins with baking parchment. If using them, start soaking your baking bands in cold water or use to manufacturers instructions.
- Beat together the butter and sugar until light and fluffy. Add the vanilla extract and the eggs, one at a time adding a little flour between each one to help prevent curdling.
- Add the sieved cocoa powder and the remaining flour. Mix until well combined.
- Pour the cake batter evenly between each cake tin. Remember to wrap the soaked baking bands around the outside.
- Bake in the centre of the oven for 20 - 25 minutes, or until baked, testing the centre of each cakes with a skewer until it comes out clean.
- Leave in the tins to cool a little before turning out onto a cake rack to cool completely before filling and topping with the chocolate mixture.
Chocolate Filling and Topping
- Melt the butter and chocolate in a heatproof bowl over a pan of simmering water, until the mixture is nice and smooth with no lumps. Leave to cool a little, but not for long or the mixture will begin to set.
- Place one of the cakes onto your favourite cake stand or plate. Carefully spread about ⅓ of the chocolate mix evenly over the top. Add the second sponge cake. Spread more chocolate over the top and sides of the cake.
- Start to add the chocolate fingers around the edges of the cake. You will need to do this before the chocolate begins to set.
- Spread any remaining chocolate evenly over the top of the already setting chocolate layer.
- Before the chocolate sets completely, start to decorate with the coloured smarties.
Notes
TIPS AND FAQ'S
- Ensure your hands are dry when decorating with smarties, as the colour could fade and discolour your hands if they are wet.
- To avoid the chocolate fingers from falling off the cake, tie a pretty ribbon around them to keep the biscuits upright.
- Separate all the coloured Smarties into individual bowls so that you can see how many you have. Press each one down a little to imbed itself firmly into the chocolate.
Jean
I love the advice re Smarties: don't eat any until you have finished!!
That would be me, dashing out to the petrol station late at night for an extra tube or two.....!!